- 2018-9-11
- Various things
- cut cut pro
- コメントを書く
Contents
Select video
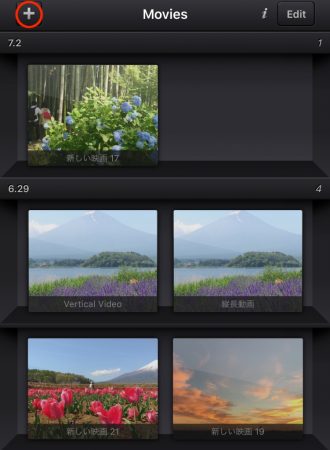
Tap the “+” button on the upper left.
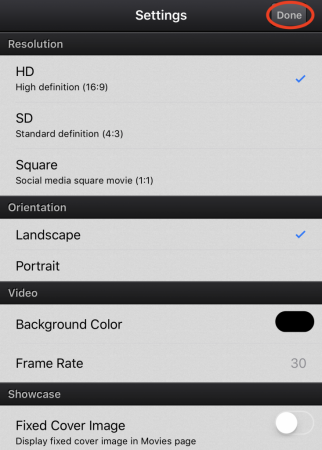
Tap Done on the upper right without changing other setting.
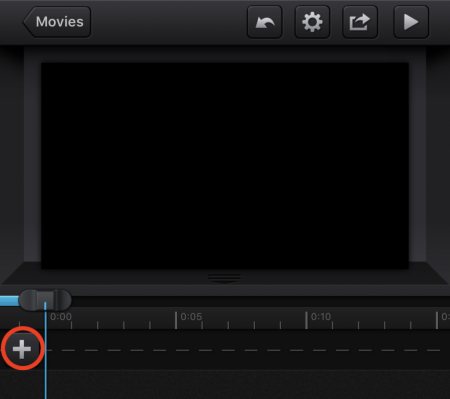
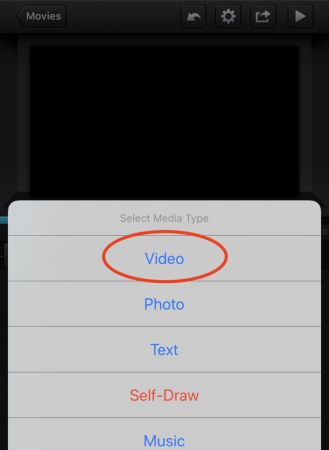
Tap the “+” button on the left to add video.
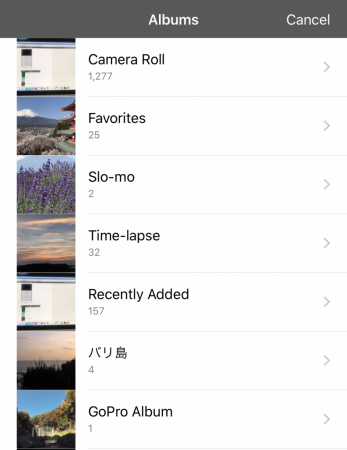
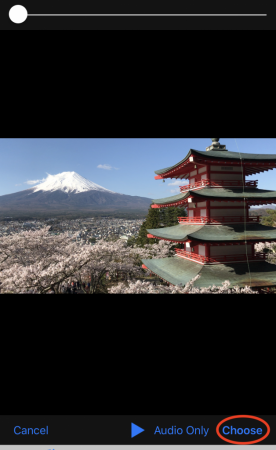
Select a video from camera roll.
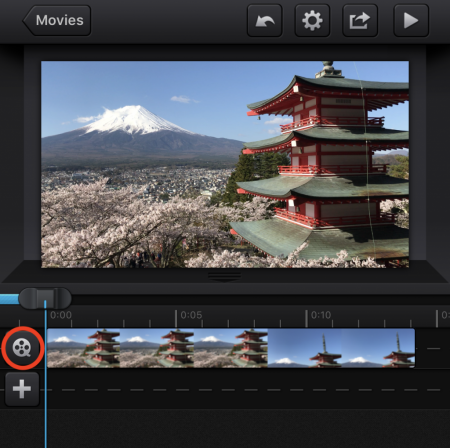
A video was added.
If you want to add another one, tap the reel-to-reel shaped button.
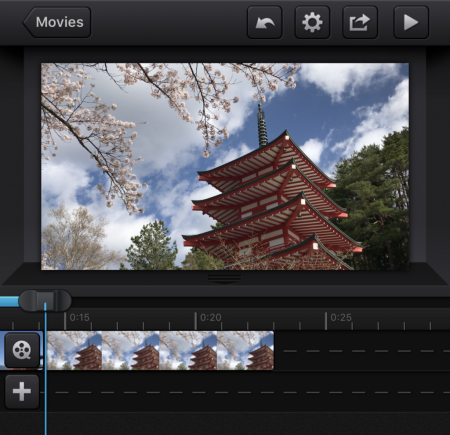
Select another video in the same way.
Change the length of the video
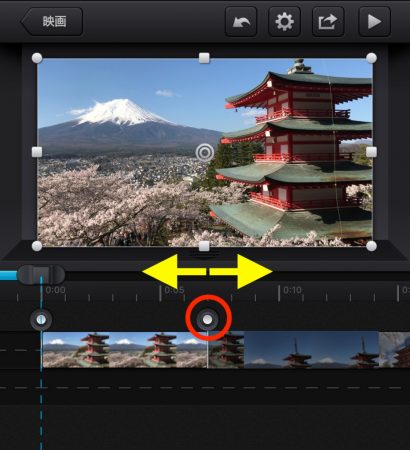
There are two ways to change the length of a video.
Two handles appears on the right and left by tapping a segment which you want to change the length.
Then pull it to change the length.

The another way is this.
Pull a lever in a red circle to move a dotted blue line to the point where you want to cut the video.
Then tap a scissors shaped button.
Add subtitle
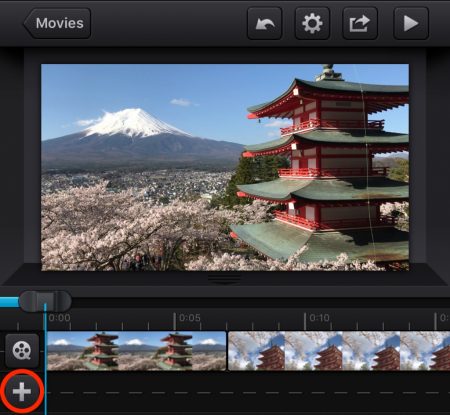
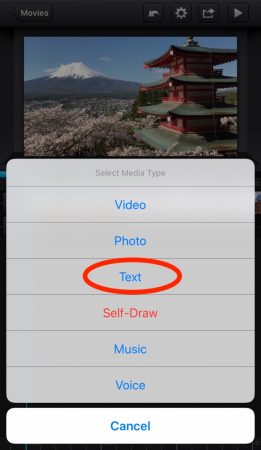
Tap the “+” button under the reel-to-reel shaped button.
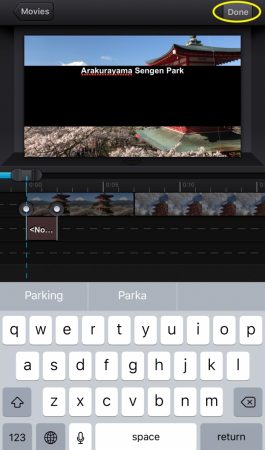
Input the text, then tap the Done Button on the upper right.
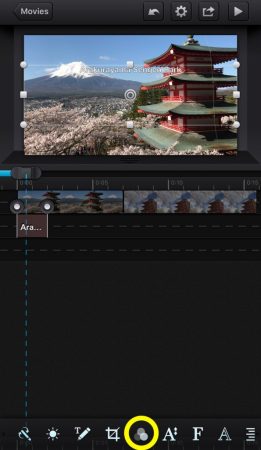
Swipe to the left until “Change Text Size / Color” button appears, then tap it.
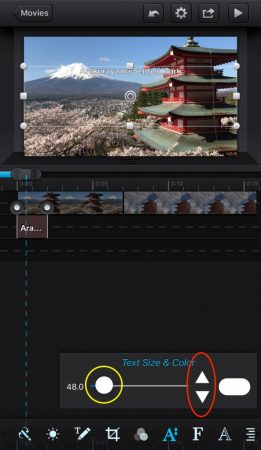
You can change a font size by a slider or triangle shaped button.
Tapping the button changes a size one by one.
If you want a significant change, use a slider.
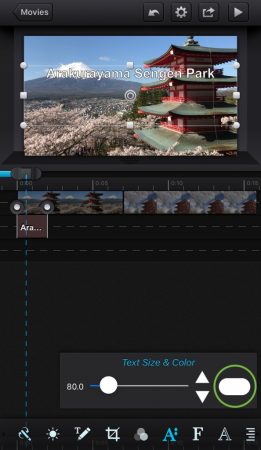
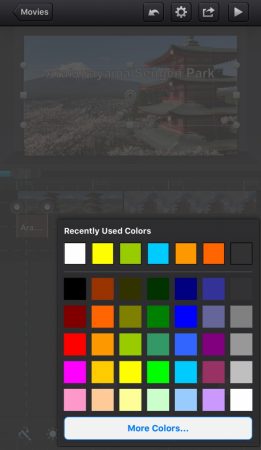
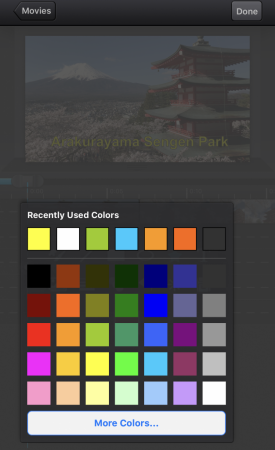
You can change the color of the text by tapping a rounded rectangle.
Then choose and tap any color you like.
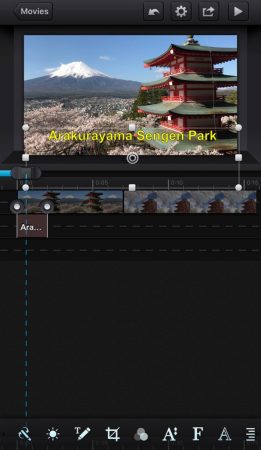
You can change the place of texts by holding down any position inner the rectangle and slide it.
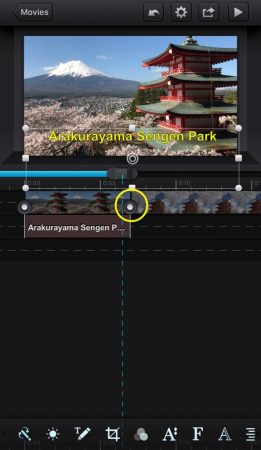
You can change the time of a subtitle by sliding the handle at both ends.
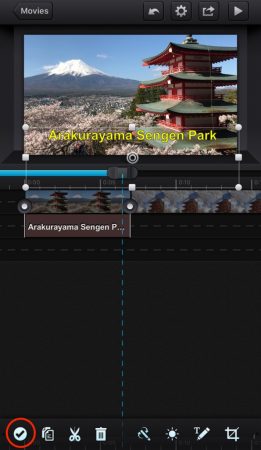
Check button appears on the left by swiping a menu bar to the right.
Then tap it to finish texting.
Add figure
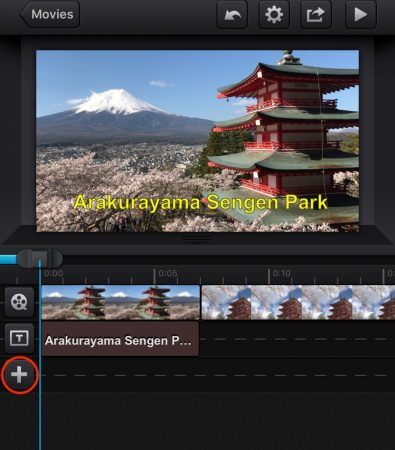
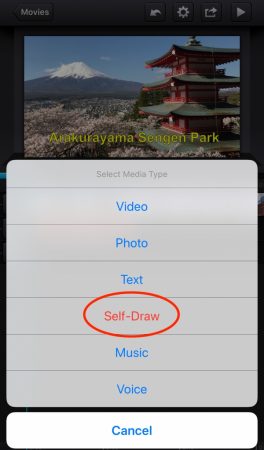
Tap the “+” button under the T shaped button to add a figure.
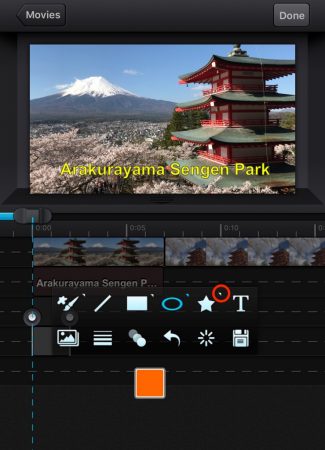
The list of the shapes appears.
A little triangle on the upper right of each shapes means it has various pattern.
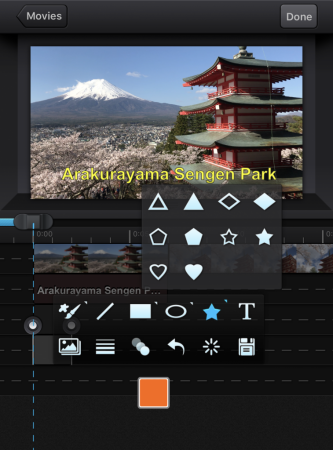
Other patterns of the shape appear by tapping a little triangle on the upper right of a star shaped button.
You can change the color of a shape by tapping a square on the bottom.
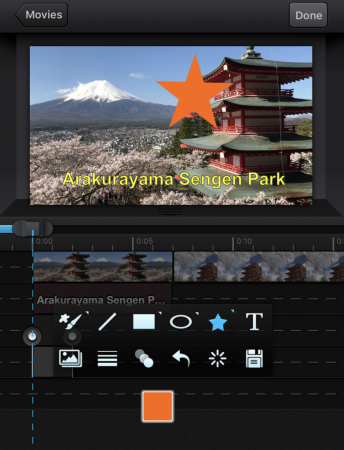
Slide your finger on anywhere of the video to draw a shape.
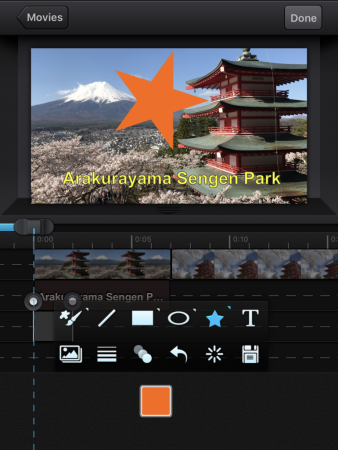
You can make a bigger shape by sliding your finger more longer.
The shape tilts if you move your finger to the left or right with keep touching a screen.
You can place it any way you like as the size and tilt can be changed later.
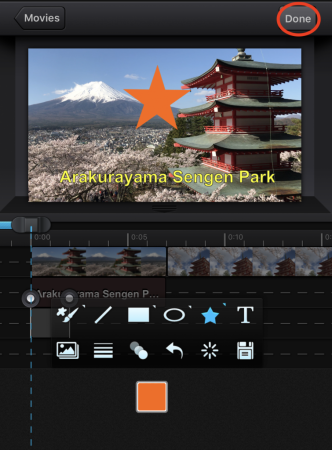
Tap Done button on the upper right after determining the rough position and size of a shape.
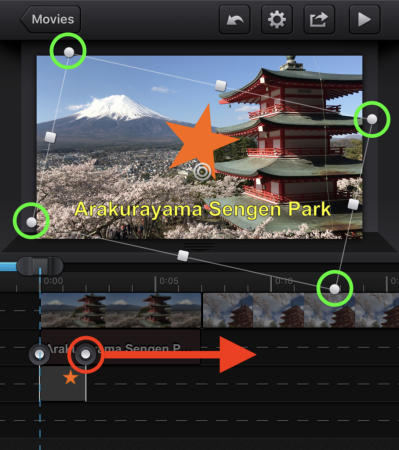
You can change the size of a shape by pinch in / out.
Moving your finger to the left or right with holding any corner of a rectangle (green circle) changes the tilt.
And you can change the place by moving your finger to the any direction with holding any position within a rectangle.
Dragging a handle in the red circle modify the display time of this shape.
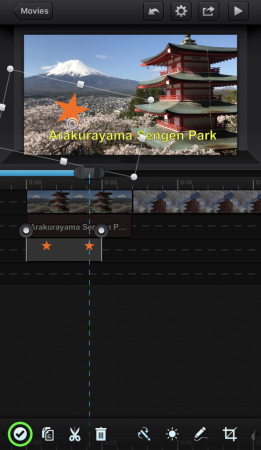
Display time of this shape to 5 seconds.
Tap a check button on the bottom left to finish editing.
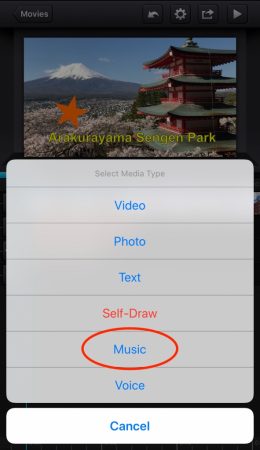
Add music
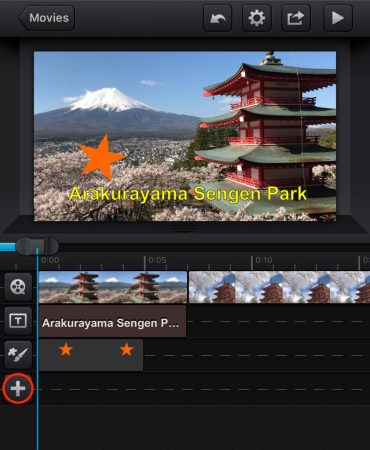
Tap a “+” button under a shape button.
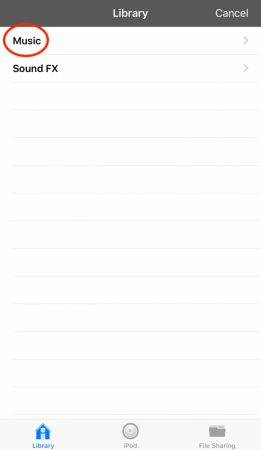
You can use musics included in this app.
But usually I use the ones in my iPhone as there are a few titles.
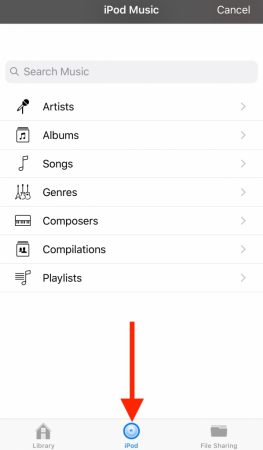
You can choose the musics in your smartphone by tapping iPod button.
I don’t know why the name of the button is iPod, not iPhone.
It haven’t changed since this app was released.
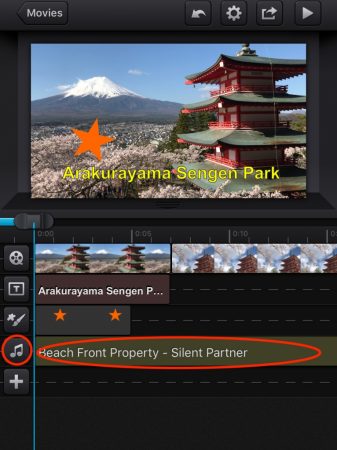
Music I choose is set to the segment.
Note mark on the left means the setting is competed.
But the length of the music is longer than a video.
So it should be trimmed.
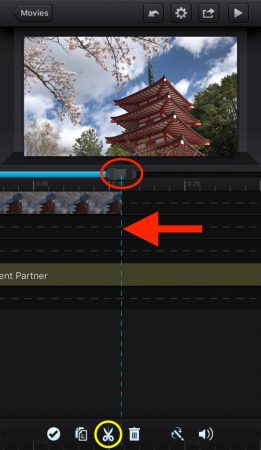
Move a slider(in a red circle) to line up a blue dot line and the end of a video segment.
Then double tap a music segment.
A menu bar appears on the bottom, then tap a scissors button.
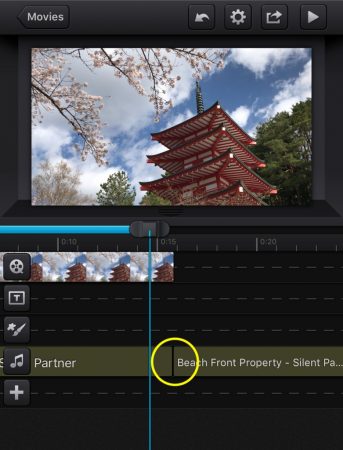
The music segment is separated by the blue line.
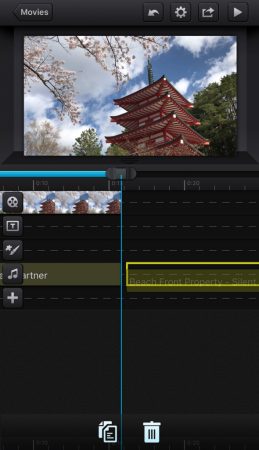
Hold a right side of a music segment, then you can move it and trash box button appears on the bottom.
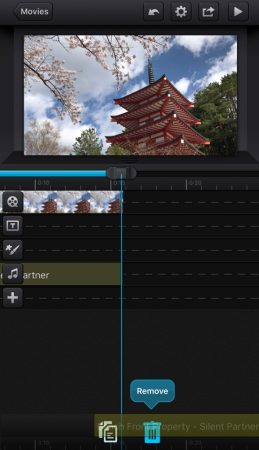
Drag it to garbage box to remove it.
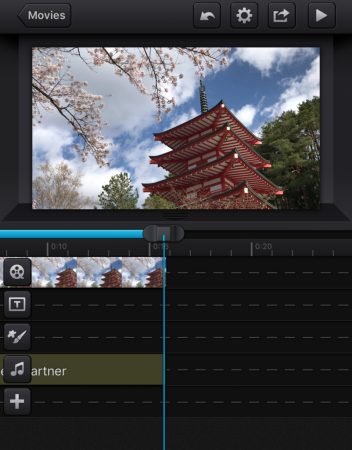
Setting of music is completed!
Export video and save to the camera roll
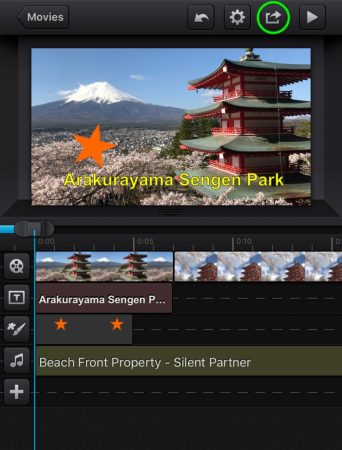
Tap an export button on the upper right to save a video.
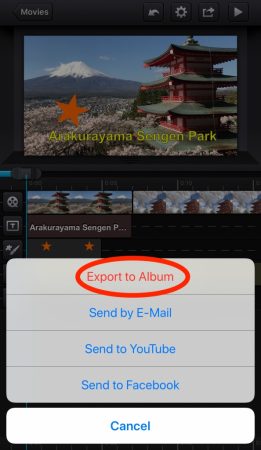
Select the place where you save video.
Tap “Export to Album” to save it in your smartphone.
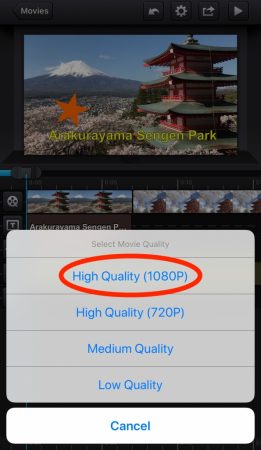
Select the video quality.
I always choose “High Quality(1080p)”.

Export process is completed done when this message disappears.
コメント
この記事へのトラックバックはありません。


この記事へのコメントはありません。